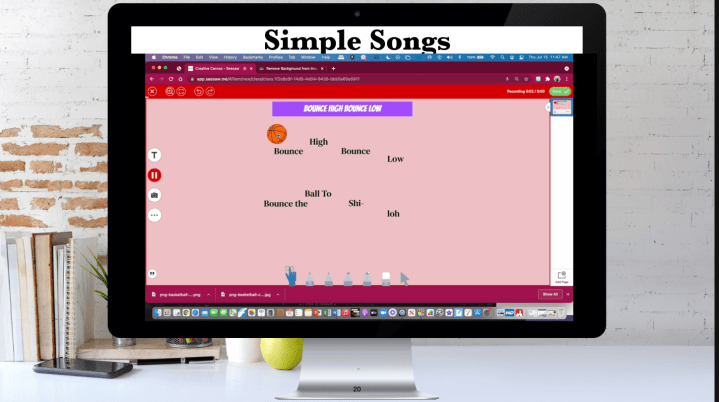
Teaching during a pandemic made many music educators find different ways to assist with their student’s learning and practice. Having students being able to access videos where they can follow a bouncy ball, see ukulele fingerings, or see recorder fingerings as they practice is a very helpful tool for the students. Though this became a necessity for some of our music classes throughout the pandemic, this is also a great tool to continue to use after the pandemic. Since many music educators had to start using a Learning Management System (LMS), we can now continue to use that system to assign and share materials with our students.
What is a bouncy ball video?
A bouncy ball video is a video that has a “conductor” that bounces over words, rhythms, notes, etc, so that the participant can follow along with the music. It assists the participant with staying on the beat and not getting lost with the musical accompaniment. These videos can be used for following simple song lyrics, following rhythm patterns, following notated melodies, and more.
How do you create these types of videos?
In this week’s YouTube episode I show three ways to create these types of videos. The first way is with Seesaw. The second is with an iPad, and the third way is with Flipgrid. All three ways are free, but the second way requires an iPad to accomplish.

To create a bouncy call video in Seesaw, you could use the drawing tool.
- Open Seesaw or create a free account
- Launch +
- Click on the drawing tools
- Click the Text (T) tool to create the title.
- Click the T tool again to create the lyrics. Create multiple text boxes so you can show the melodic direction of the song.
- Click … to change the color of the background (optional).
- Drag onto the screen a picture of a ball. If the ball does not have a transparent background, use remove.bg to remove the background.
- Click on the 🎤 (microphone) tool and move the ball while you sing the song.
- Click ✅ when finished.
- You can now resize the video so you can delete the original background.
- You can submit this to the post so the students and their caregivers can receive it and sing along at home.
- Or, you can create an activity around the video, by doing this same process when making the activity. One suggestion is to create the video on one slide or for the multimedia example, and then give them the materials to make their own bouncy ball video. This way you can assess them.
iOS Assistive Touch Button
- I credit David Row for this idea.
- Make sure your settings on your iOS device have turned on the Assistive Touch button.
- Go to Settings>Accessibility>AssistiveTouch>On
- Make sure your screen recording tool is able to be used. I move mine into the control center. Control Center>Screen Recording
- Find the lyrics by performing a search on a browser (Chrome or Safari).
- Activate the screen recording (make sure you hold down the microphone to turn it on), sing, and move the Assitive Touch button over the lyrics while you sing.
- When finished, the video saves to your camera roll and you can share it on an LMS.

- I credit Katie Wardrobe for this idea.
- Flipgrid is free to use and you can create a video to share on other platforms or in the groups you create within the app.
- Click on “Shorts”.
- Click the Effects>Board> and choose a background. Slide the screen around so you and the brackground are next to each other on the screen.
- Click Effects>Photo and upload a lyrics sheet, a recorder composition, a melody, ukulele chord pictures, etc.
- Click Effects>Stickers and choose a sticker to be the conductor.
- Click the large circle to sing and move the conductor, or to play the recorder, or to play the ukulele, etc, as you record the video.
- When finished, you can record another part of the video or choose the thumbnail and save.
- You can share this with one of your Flipgrid groups, or download it to share with any of your LMS, or upload it to your YouTube channel to share with students as an unlisted link (or to place that YouTube link into viewpure to create a link with no advertisements, comments, or “next up” videos).
Check back next week for Episode 5 of The Best of Pandemic #Elmused Tech!


